Configure Entity Fetcher
Entity fetching is the process in which Tonkean sends an API request to an application to get or update a single data source record for a specified entity. For example, the entity fetcher might request the updated status of a single Opportunity in Salesforce.
Entity fetching occurs whenever a create or update action is activated for the data source and Tonkean sends a request to get the latest updates for the relevant data source record. For example, if you have a module workflow featuring a Salesforce action that updates an Opportunity, Tonkean first sends an API call to update the Opportunity, and then sends a second call to get the updated Opportunity from Salesforce, ensuring the Tonkean database is in sync with Salesforce. This second request is made by the entity fetcher.
Simply put, entity fetching is how Tonkean keeps data source records up to date between the Tonkean database and the application itself whenever a relevant action occurs.
Configure the Entity Fetcher Request
To ensure data source records are updated as expected, you must configure the API request, including defining the path, query parameters, and header, where necessary. To locate the information needed to configure the request, refer to the relevant API documentation for your application.
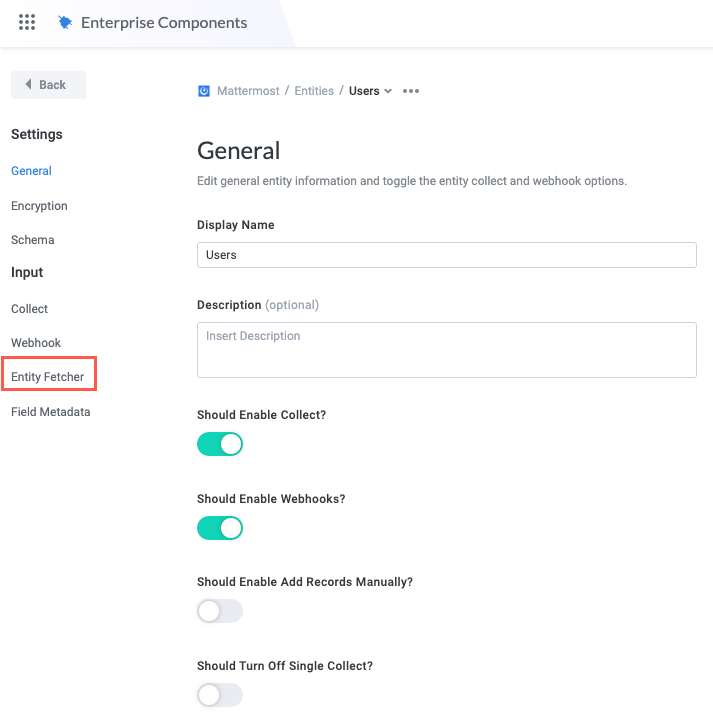
In the Entities Settings panel, select Entity Fetcher. The Entity Fetcher screen displays.
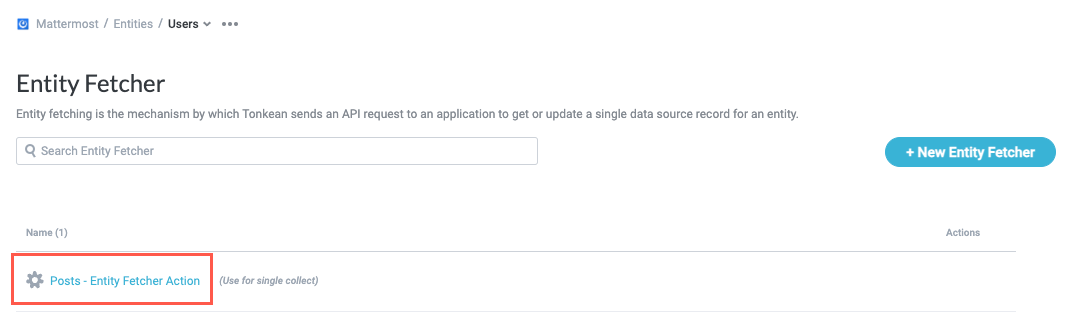
Select the entity you configured the collect for. The Entity Fetcher configuration screen displays.
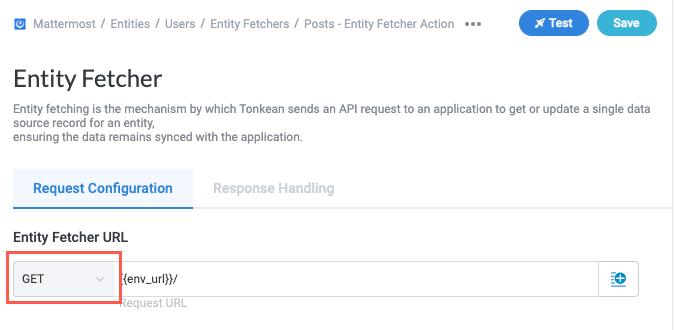
In the Entity Fetcher URL field, select the method dropdown and choose the API method for the request.
In most cases, the entity fetcher sends a GET request.
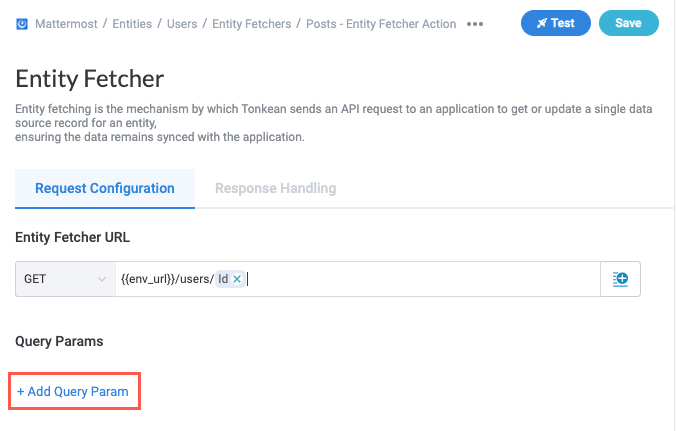
Referring to the relevant documentation for your application, locate the request path and enter it into the Entity Fetcher URL field. If you created a parameter to provide a value for a path variable, select the insert field button,
 , to add the parameter.
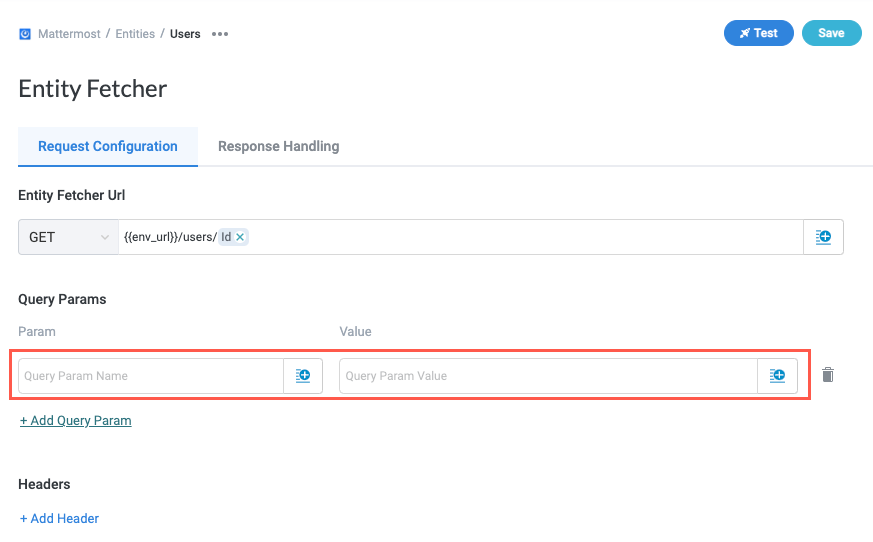
Some APIs may require you to pass in certain query parameters (params). To add a query param, select + Add Query Param. A pair of param configuration fields displays: Param and Value.
Param - The query param name, sourced from the application's API documentation.
Value - The assigned query param value.
Enter the Param and Value, then select the On which request? dropdown to choose when to pass in the param value.
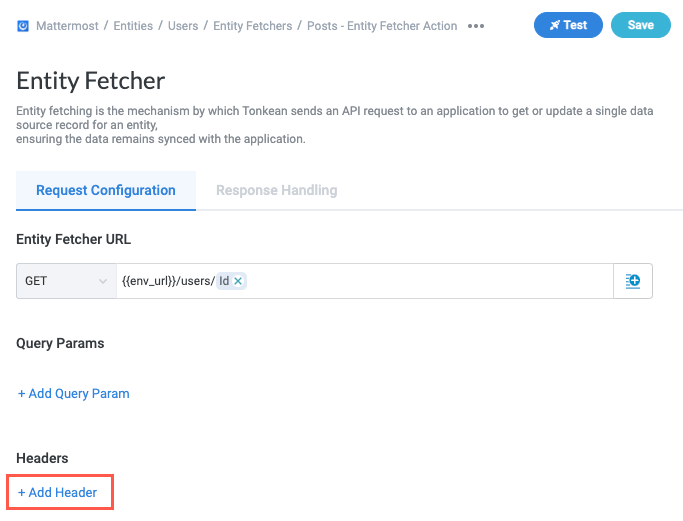
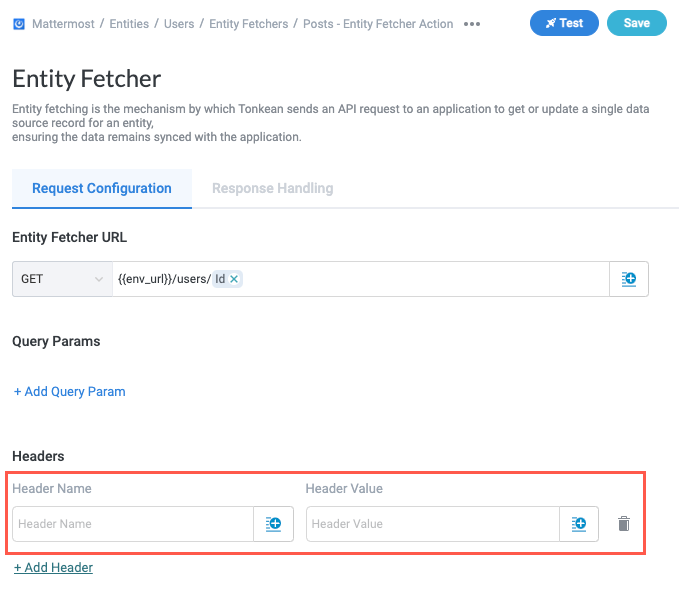
Where relevant, select + Add Header to add any header values to the request. Header Name and Header Value fields display.
It's rare to include header values with the entity fetcher. Header values are often used for authentication and configured on the Authentication screen. Refer to the application's relevant documentation to determine if you need to include header values.
Enter the Header Name and Header Value for each header value you include.
Set Advanced Request Options
The Advanced section features several options for more complex use cases. Select the relevant checkbox to enable any of these options:
Ignore untrusted certificates - Ignore warnings generated by SSL or TLS certificates your browser has marked as untrusted.
Disable auto charset - Disable automatic assignment of the character set. Enable this option if you want to set the charset for your request by manually setting a value for
Content-Type(for example,Content-Type: text/html; charset=utf-8).Disable follow redirects - Disable automatic browser redirection.
Keep trailing forward slash - Maintain the trailing forward slash, "/" in the request path. Generally, the presence of a trailing slash indicates the resource is a directory as opposed to a file, which doesn't usually have a trailing slash.
Remove keys with empty values - Remove any keys without a corresponding value.
Support file download - Enable file download. Select this option only for APIs with built-in file storage and download capability (such as downloading a file from DocuSign).
Test the Entity Fetcher Request
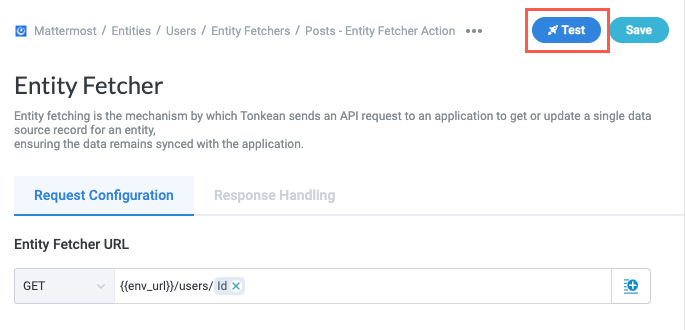
After you have configured the request, you can test it to make sure it's working as expected.
Select Test. The Run Test window displays.
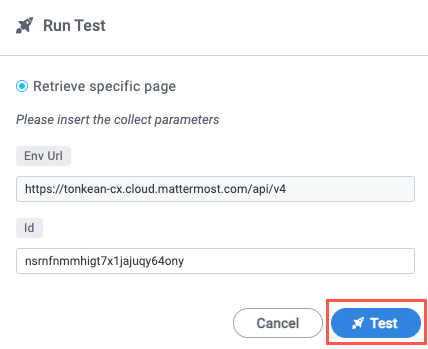
Enter the values for any custom params you included. In the example below, the endpoint requires passing in the
idfor the user, which we created a custom param, "Id", for when configuring the entity collect.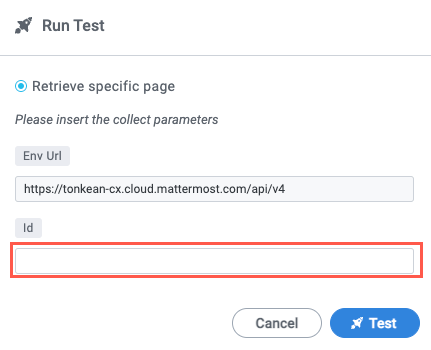
When finished, select Test.
Handle the Entity Fetcher Response
With the request complete and successfully tested, you can select the field in the response you want to extract to ensure Tonkean updates the correct data source record.
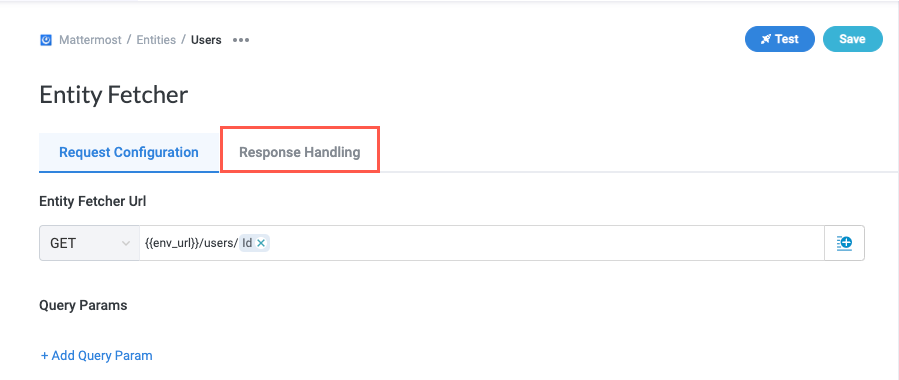
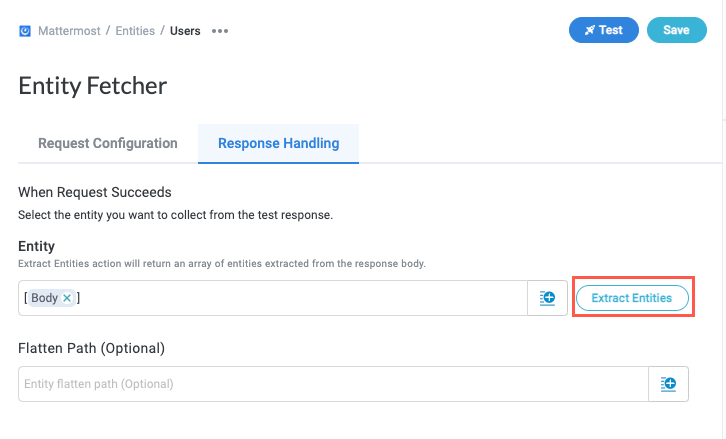
Select Response Handling. The Response Handling tab displays.
In the response you received from the previous test, select the relevant object for the entity you want to collect.
Because the fetch requests a single data source record, it's common for the response to contain an object without a parent element you can select. If the response doesn't contain a parent element, select the insert field button,
, in the Entity field and select the Body response param.We recommend wrapping the "Body" param in brackets, making the extracted entity an array. Including brackets helps Tonkean to extract multiple data source records if a fetch occurs after multiple data source records were updated simultaneously.
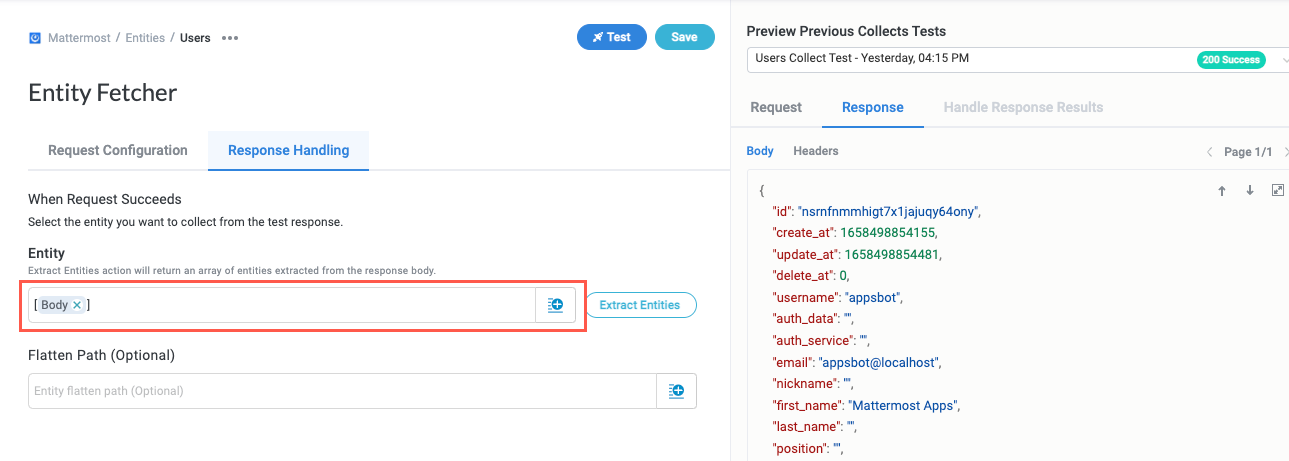
After selecting the entity you want to collect, select Extract Entities. After processing, several new entity fields display on the Response Handling tab.
In the Entity Unique Identifier field, select the insert field button,
, and select the field that acts as the unique identifier for each entity object.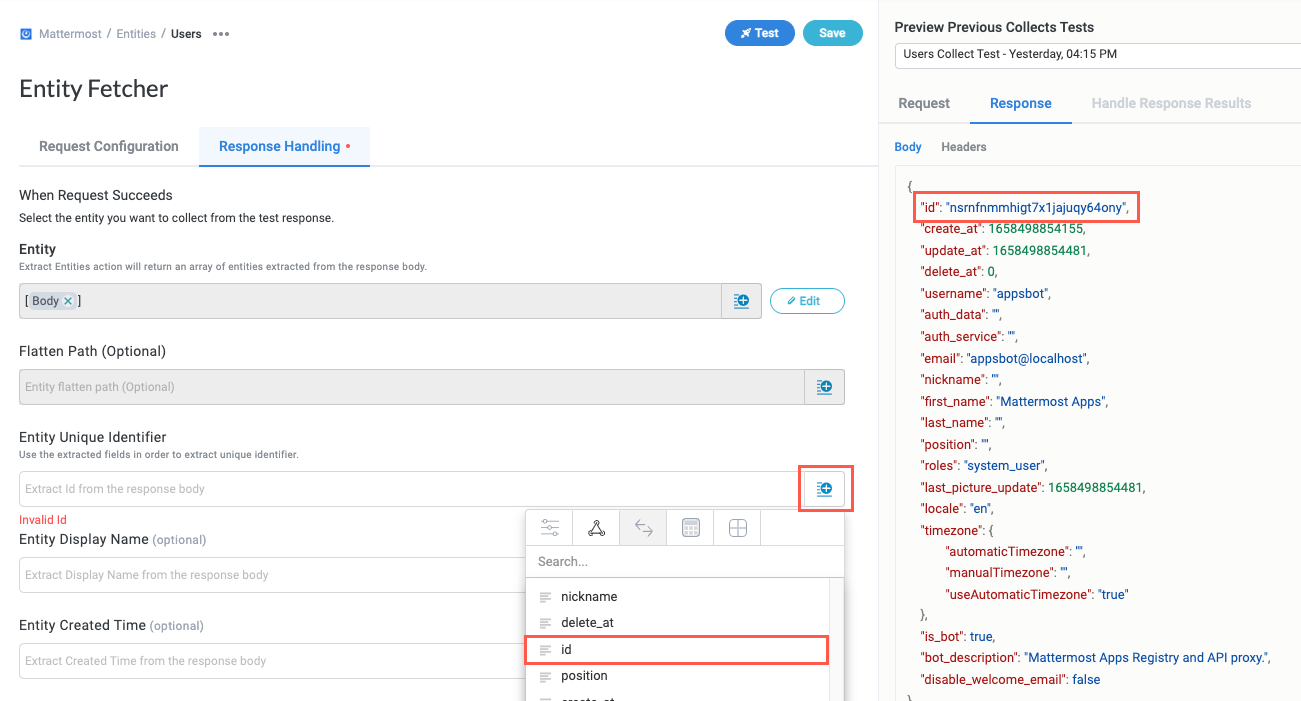
Enter an Entity Display Name. This is the name that displays for other users who connect to the data source—it displays on the Data screen and on the relevant business report. We recommend using a clear, title-case name. For example, "User" instead of "user".
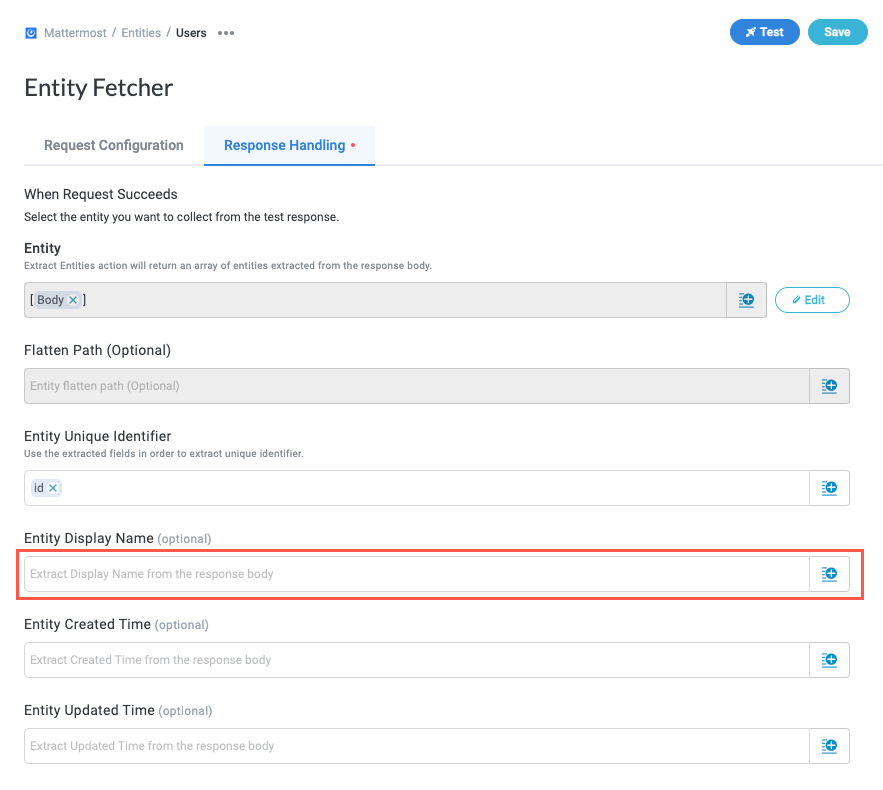
For each remaining field, enter a value manually or select the insert field button,
, and select the corresponding field from the response, if desired.When finished, select Save.
Entity fetching is configured.