Configure Authentication
Authentication is the process by which a user's identity is validated and they're given permission to access the data source. Each application has specific requirements for user authentication and authorization—read the requirements carefully in the relevant API documentation before you begin the configuration process in Tonkean.
We use the term "authentication" in the inclusive sense, including both authentication and authorization steps needed to connect an application to Tonkean.
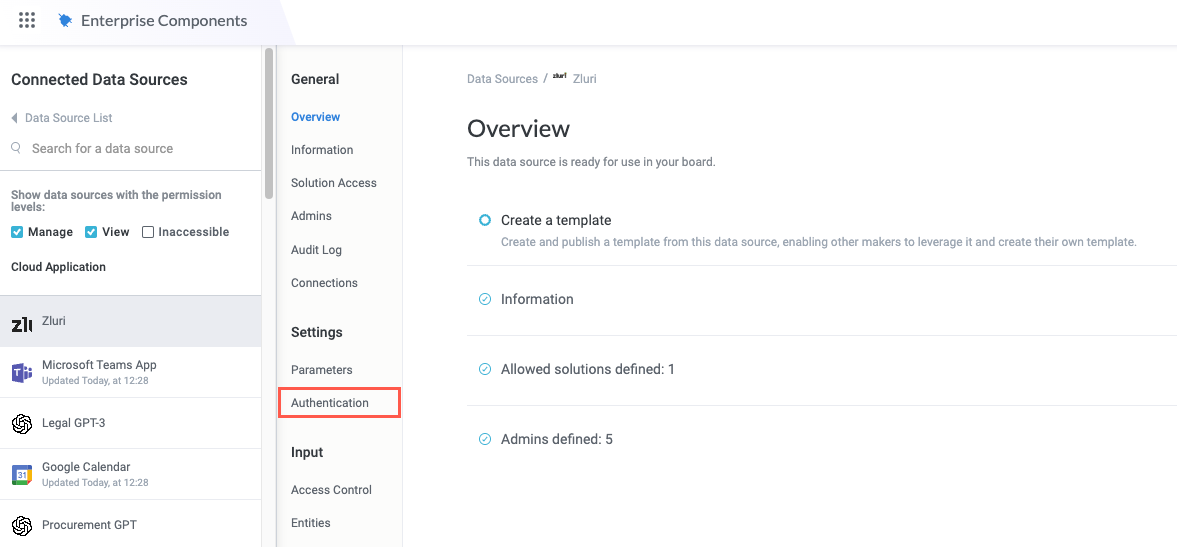
To configure authentication for the data source, first navigate to the Authentication screen:
In the data source configuration panel, select Authentication. The Authentication screen displays.
Set the Base URL and Authentication Type
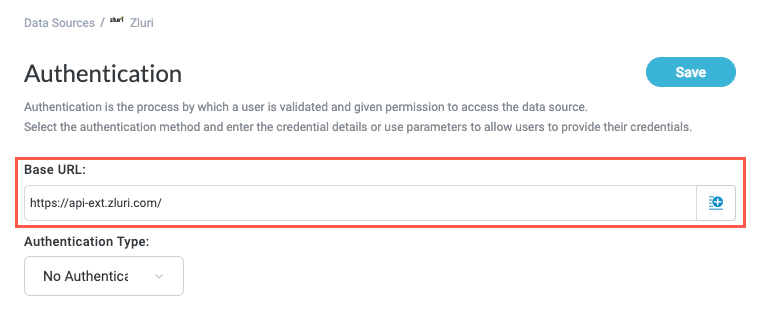
The base URL is the consistent portion of the URL used to send requests to the application's API. The endpoints for specific requests are appended to the base URL, including authentication.
Refer to the relevant documentation to locate the base URL and enter it into the Base URL field. If you created a parameter for a part of the base URL, select the insert field button,
 , to choose from available variables.
The base URL is usually found in the schema and can also be referred to as the "base path".
Select the Authentication Type dropdown and choose how users are authorized to connect to the data source. Refer to the relevant documentation to determine what authentication methods are supported by the application.
Where supported, we recommend authorization using API key. This method tends to be the most resilient while still offering sufficient security.
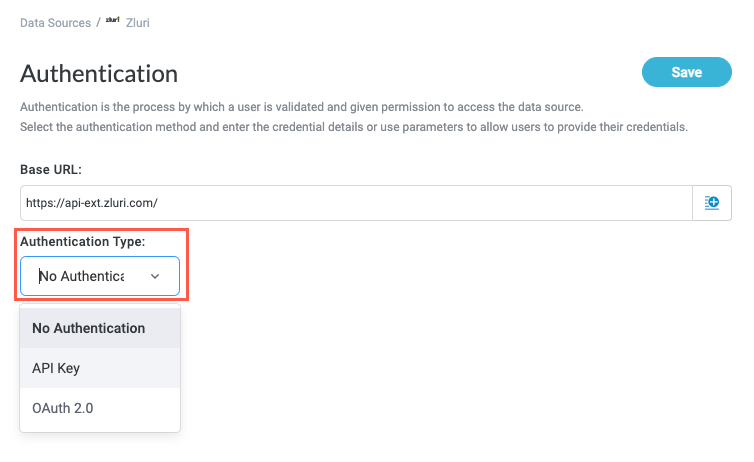
When you select an authentication type, the screen responds and populates with relevant fields for that type (with the exception of No Authentication, in which no additional configuration is needed).
API Key Authentication
Authentication using an API key leverages the request header to pass in credentials. This authentication method supports various authentication types that use the header, such as using a personal access token or basic authentication. If the application's API supports authentication using the header, you can use API key authentication.
We recommend API key authentication for most users because this method is sufficiently robust while avoiding problems inherent to single-user access methods, such as handling change management.
To configure API key authorization, follow the steps below:
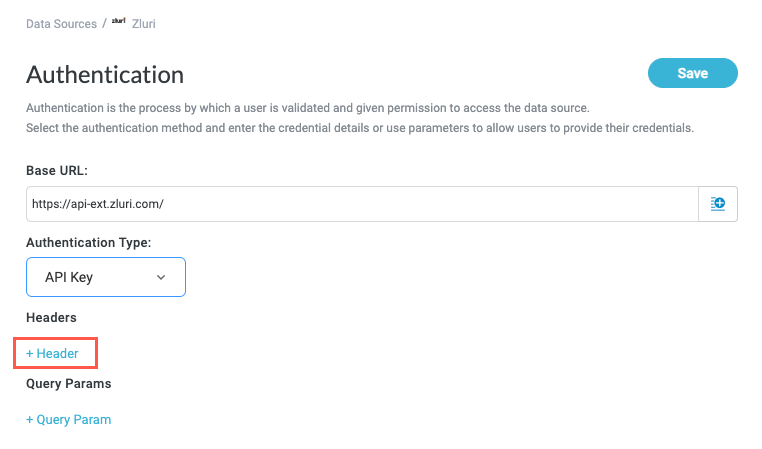
In the Authentication Type dropdown, select API Key. Headers and Query Params fields display.
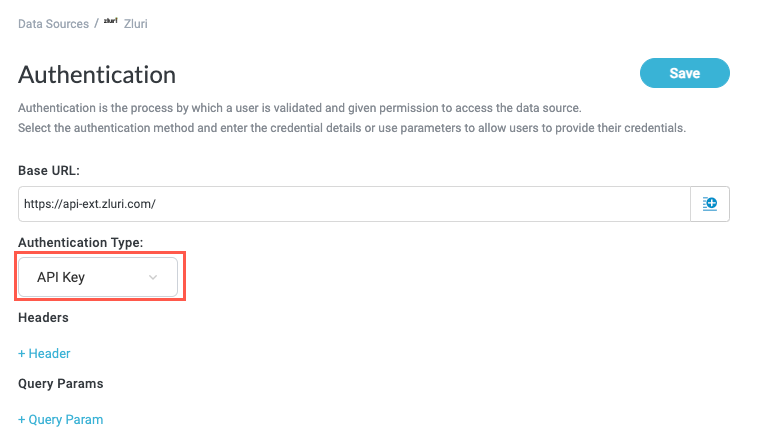
Select + Header to add a header key-value pair. Header Key and Header Value fields display.
Refer to the relevant API documentation for the header authentication parameters and enter them in the appropriate field.
If you're enabling users to provide a personal access token, or another similar token, create a parameter for the token and select the insert field button,
, to insert the variable.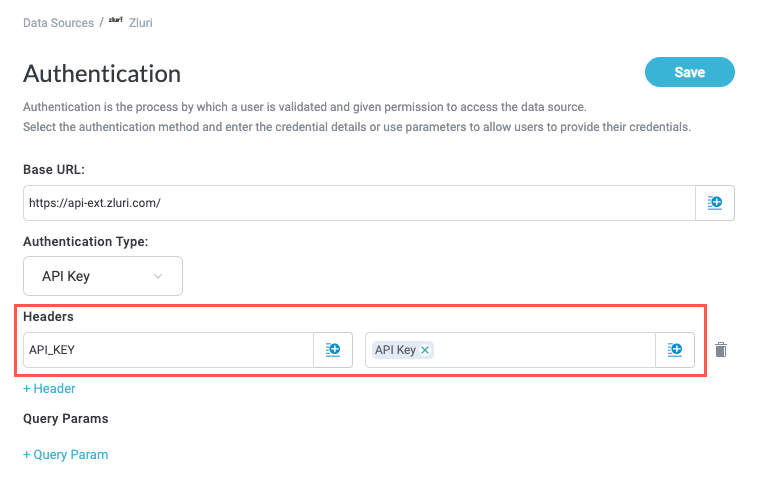
While every API is unique and you must refer to the specific documentation for the API you're working with, most APIs follow similar patterns for token authorization. Below are some common patterns for token authorization:
API Token auth:
"token": "{tokenValue}"Personal access token auth:
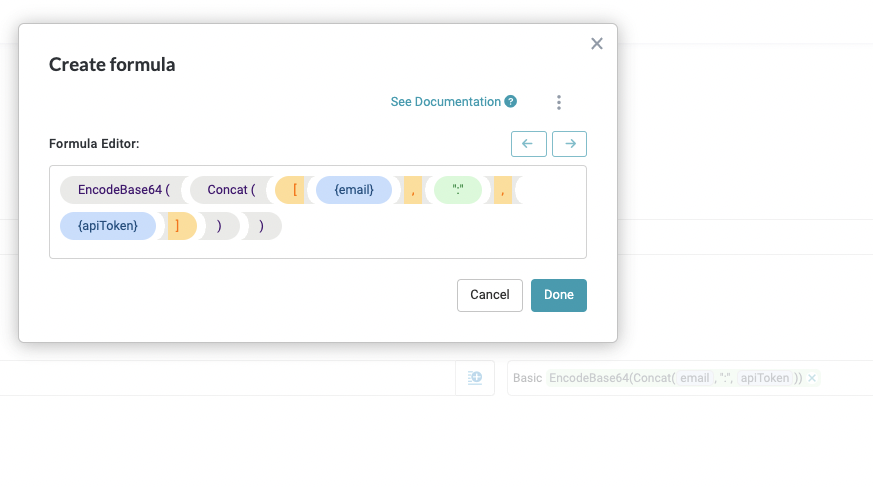
"Authorization": "Bearer {tokenValue}"Basic auth:
"Authorization": "Basic {base64Encode(username:password)}"For basic authentication, use the Encode to Base64 formula: EncodeBase64({Input}). Construct your formula in the following format to encode the email and token (or password) value:
When finished, select Save.
Authentication using an API key is configured.
OAuth 2.0 Authentication
OAuth 2.0 is an authorization standard designed to allow an application to access resources on behalf of a user without sharing that user's credentials with the hosting or server application. Where supported, you can configure OAuth authentication for your data source.
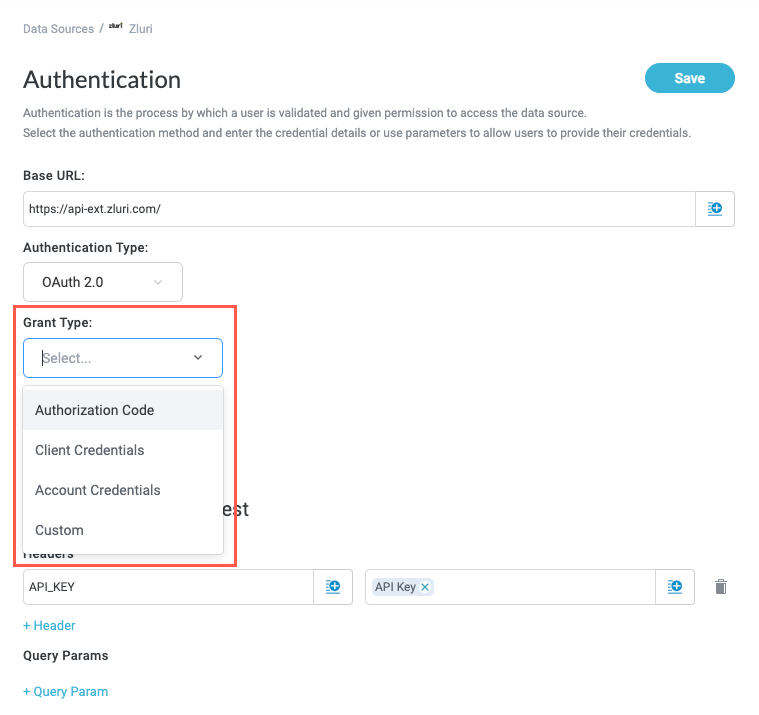
In the Authorization Type dropdown, select OAuth 2.0. OAuth configuration fields display.

Select the Grant Type. The grant type determines the required fields.
For more information regarding the OAuth grant types, see OAuth Grant Types.
Referencing the relevant API or developer documentation, enter the required values based on the selected grant type.
To build a custom OAuth authentication process, select the Custom grant type. Once selected, you are redirected to the custom action builder where you can create and configure the relevant calls.