Create a Business Group
From any screen, select the main nav icon,
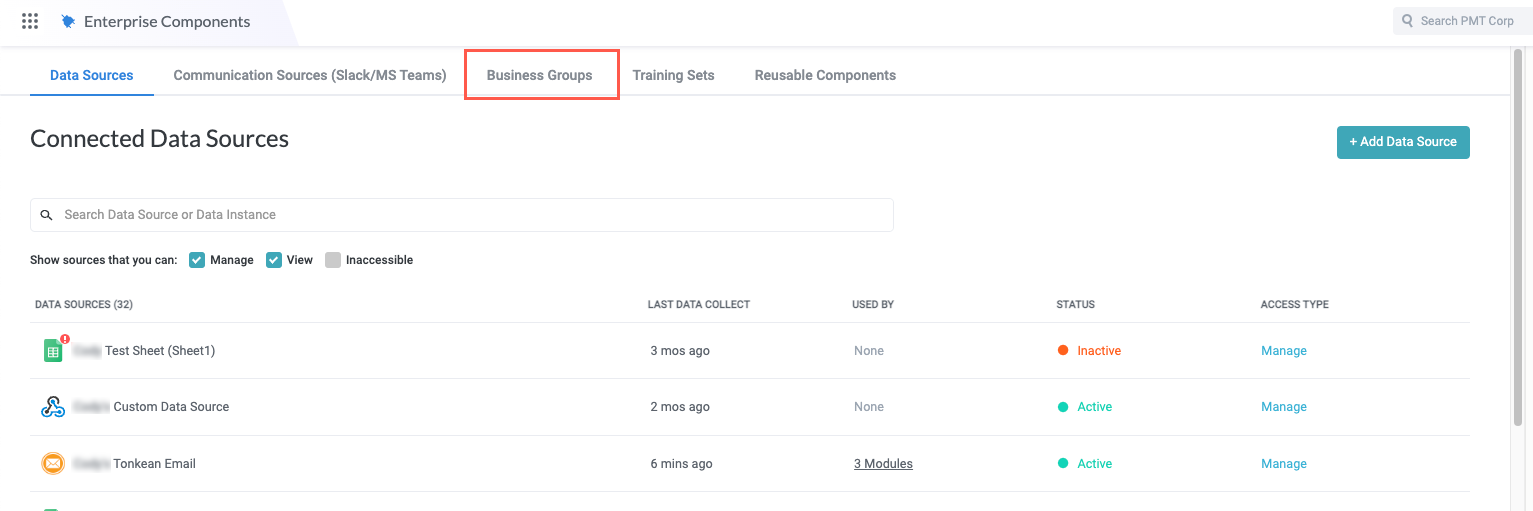
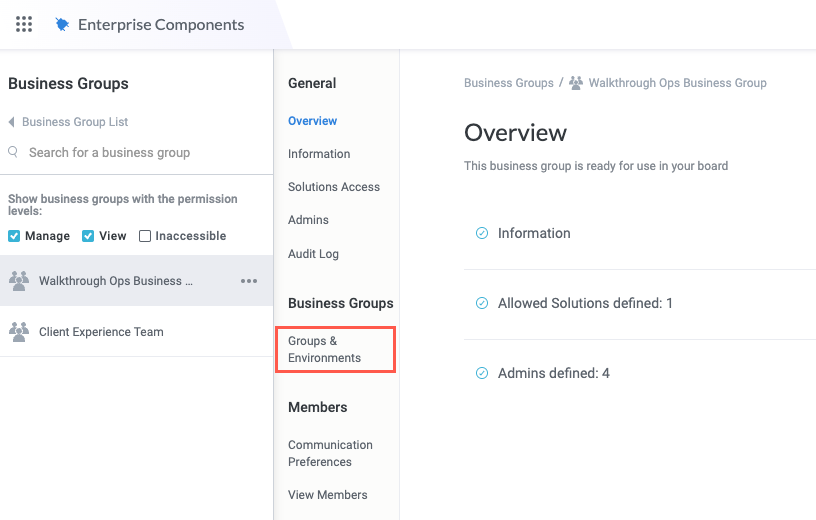
 , in the top left and select Enterprise Components. The Enterprise Components screen displays.
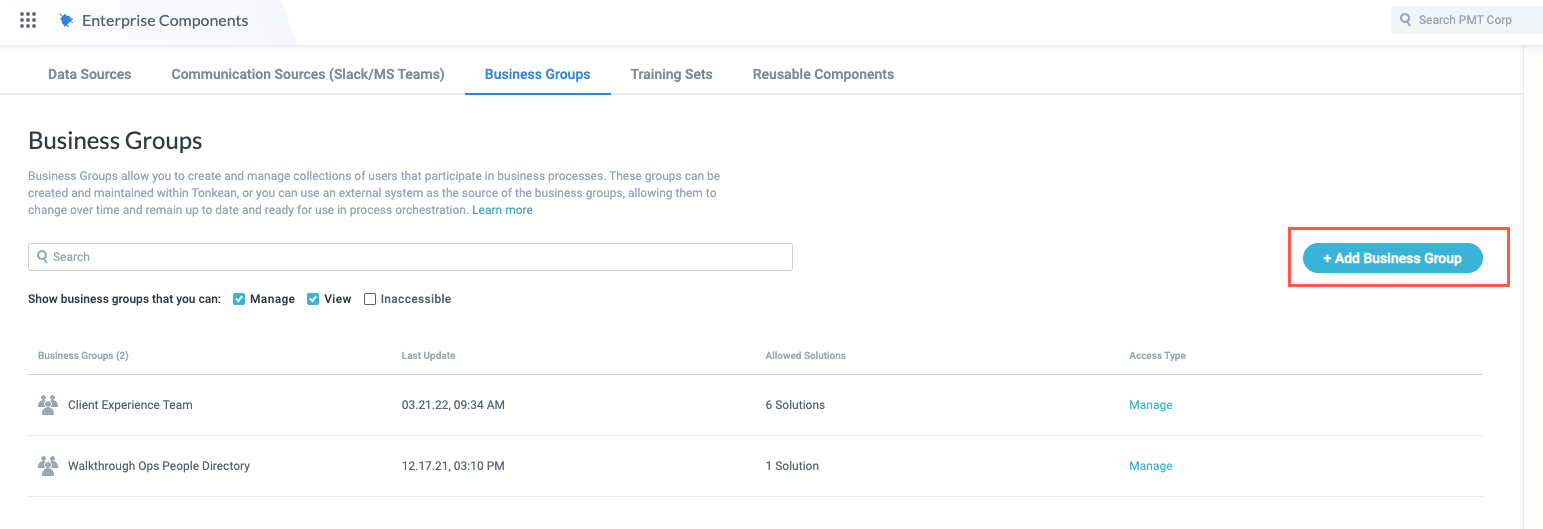
Select the Business Groups tab. The Business Groups screen displays.
Select + Add Business Group. The Create a new business group window displays.
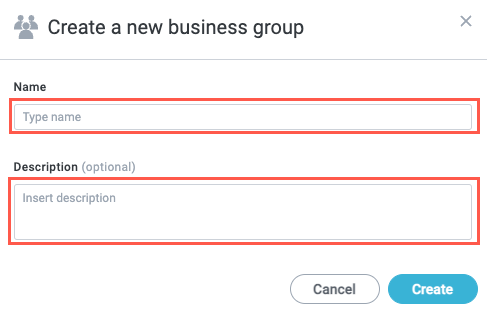
Enter a descriptive name for the business group, as well as a more detailed description, if desired. A description can be helpful when collaborating with multiple makers or when there are multiple business groups that have some overlap. When finished, select Create. The business group configuration panel displays.
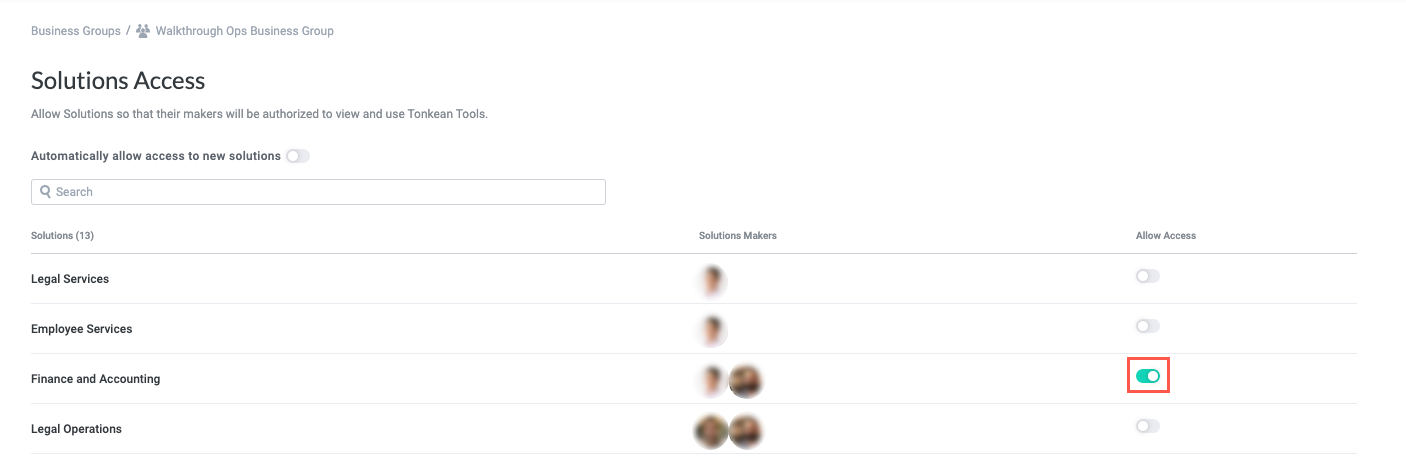
Select Solutions Access. The Solutions Access screen displays.
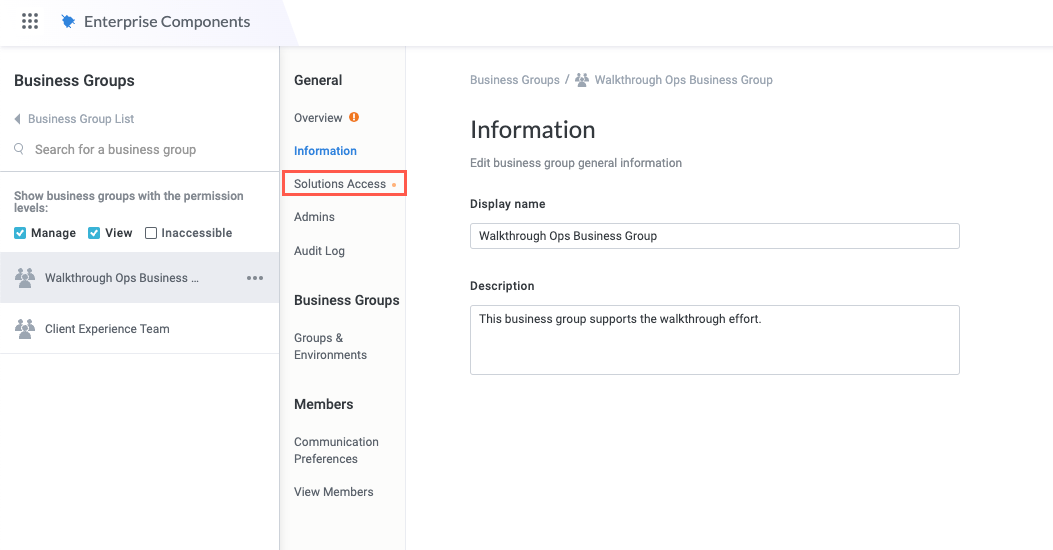
Select the toggle that corresponds with the solution you want to use the business group in.
The business group has been created. The next step is to add and configure groups.
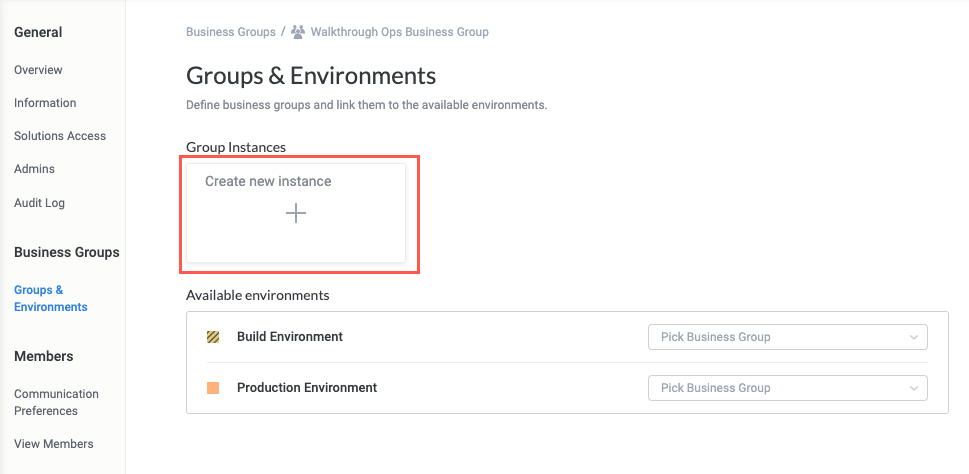
Add Group Instances
A business group instance is a version of a group that's specific to an environment. Each group should share a common business function. For example, a business group might contain all the members of a team that receive certain process updates.
From the business group configuration panel screen, select Groups & Environments. The Groups & Environments screen displays.
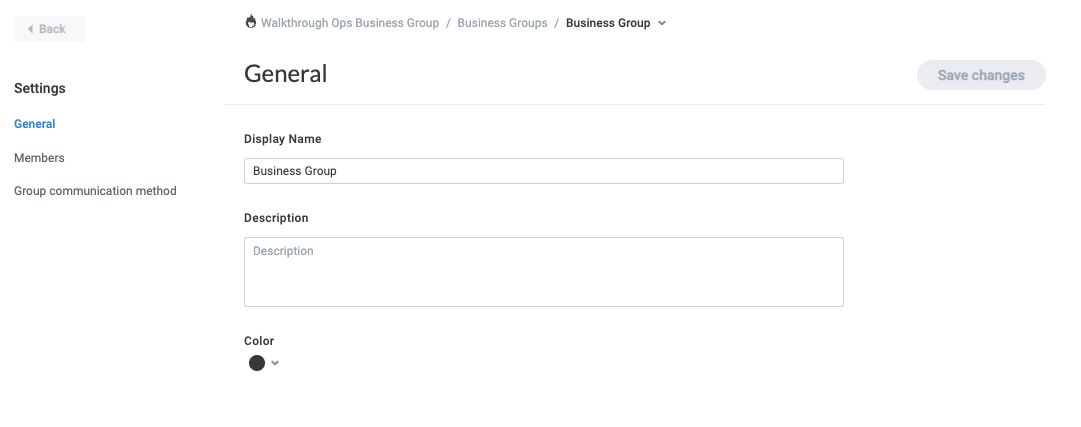
Select the Create new instance tile. The Business Group screen displays, with the General screen selected by default.
Enter a descriptive name for the business group, provide a brief description, and select a color that identifies the group, if desired. When finished, select Save changes.
Select Members. The Members screen displays.
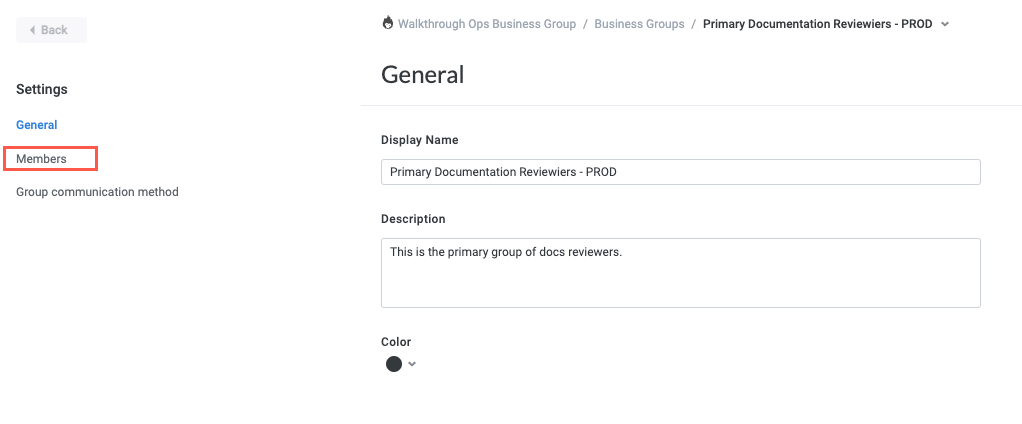
The Members screen is where you add members to the business group. Select the Member source dropdown to choose from the three options for adding members:
Adding or removing users from a business group immediately updates that business group instance. You do not have to publish the relevant solution.
Manual (default) - Enter the group members manually in Tonkean. This option is designed for smaller groups that are not managed in an external system.
The manual option is a good option for testing purposes (that is, the instance used in your Build environment), since you will likely have relatively few members and those members can be added or removed easily within Tonkean.
In the Member source dropdown, select Manual.
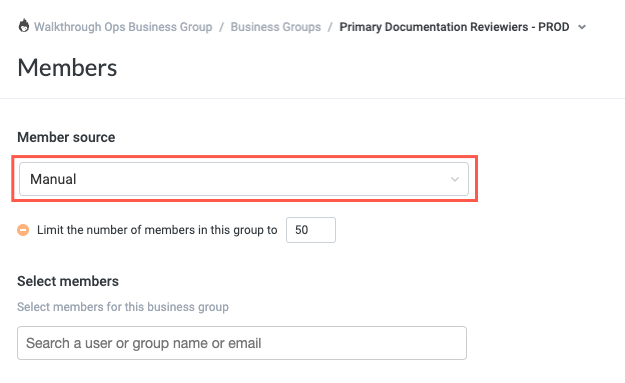
Define the maximum number of members in this group, if desired.

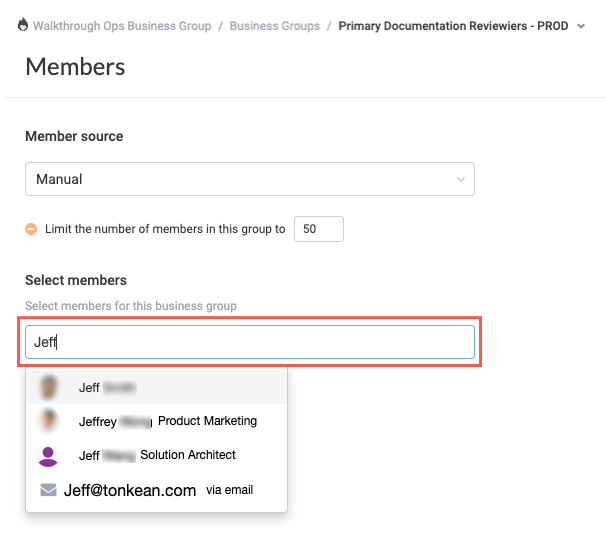
In the Manage members field, enter the names of users you want to include in the business group. The field autofills the names of process contributors that exist in your Tonkean instance (those with Tonkean login credentials).
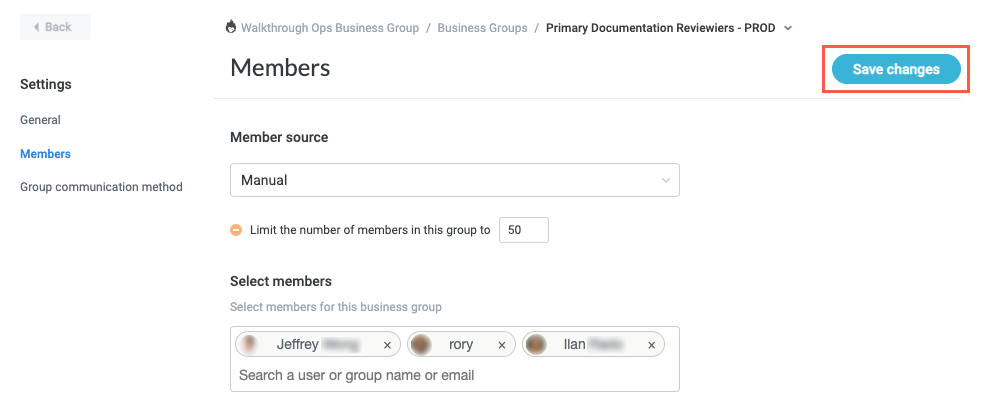
After entering all the group members, select Save changes.
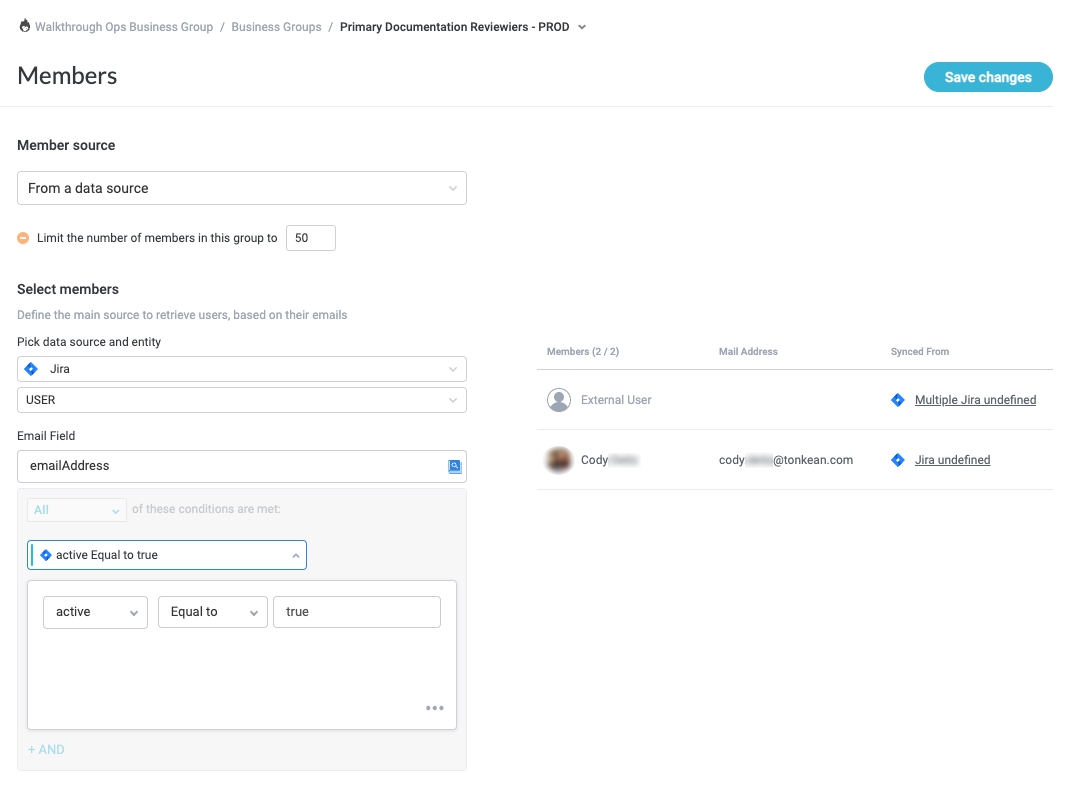
From a data source - Import the members from an external data source. This option is designed for groups that already exist and are managed in an external source (for example, a customer list in Salesforce or a list of employees in a Google sheet).
When importing members from a data source, the unique identifier of the entity must be the email field. These email addresses are case-sensitive and must match the case of email addresses found in your identity provider, where relevant.
In the Member source dropdown, Select From a data source.
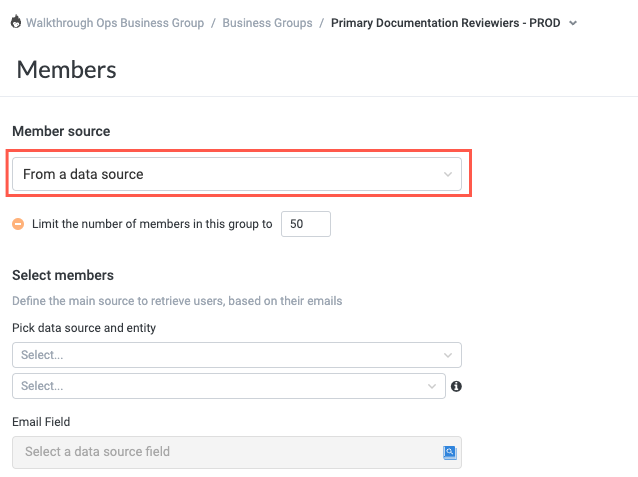
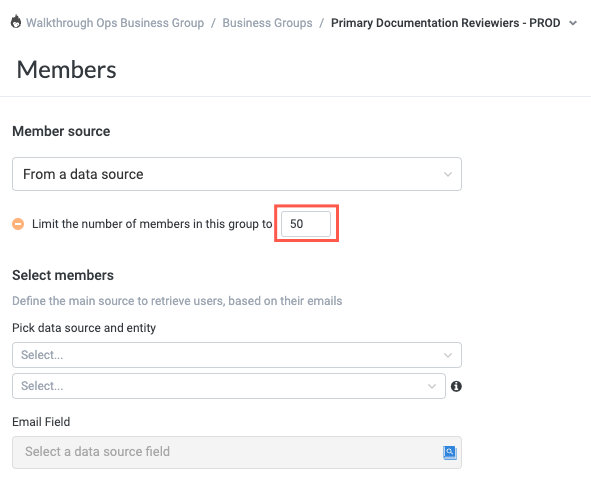
Define the maximum number of members in this group, if desired.
For business groups that are pulled from a data source, limiting the number of members in a group is a helpful backstop that can prevent accidentally sending communications to an entire group of users in the case of an incorrectly configured filter.
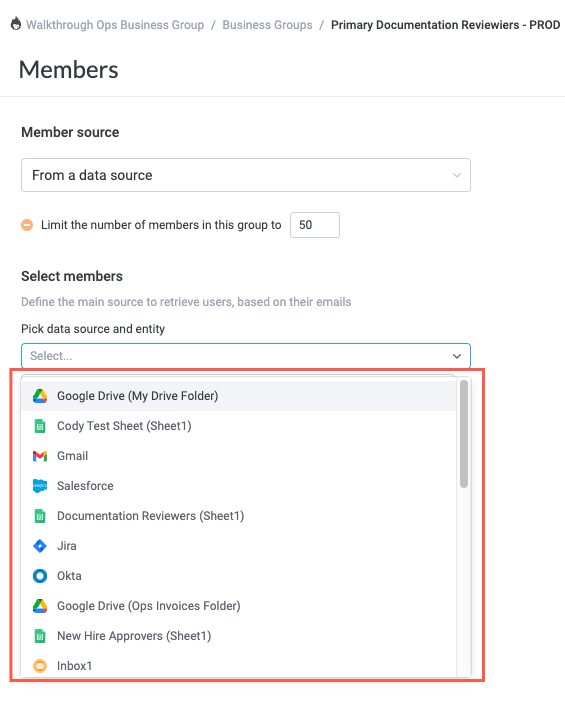
Select the first Select users from dropdown, and select the data source that contains the users to include in the business group.
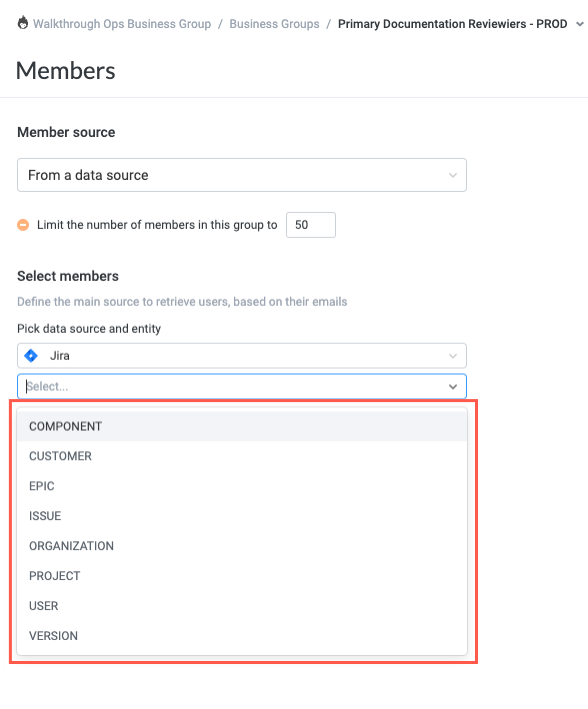
Select the second dropdown and select the object that contains the email address for the users. For example, in Jira, USER contains all the user data, including display name and email address.
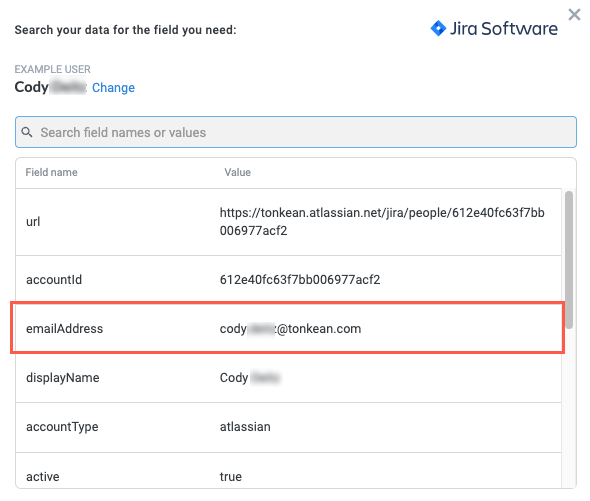
Select the Email Field. The field select window displays.
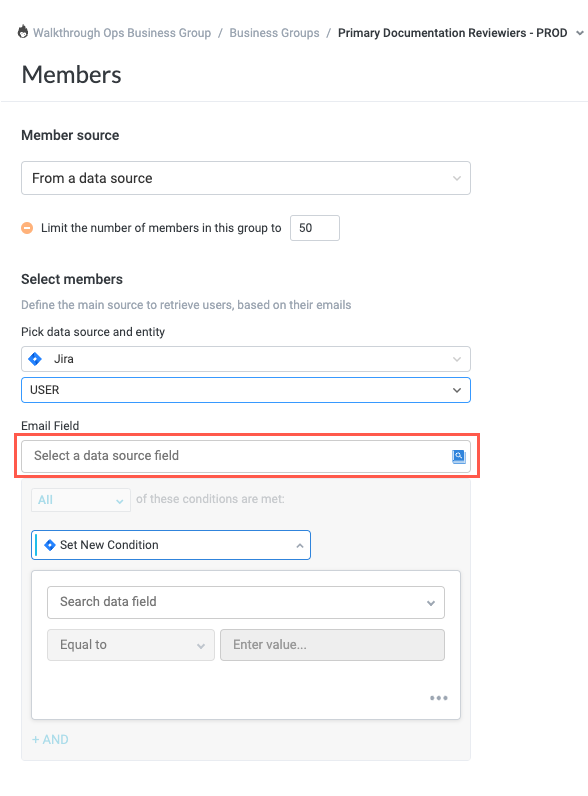
Select the field from the data source that contains the email address of the user. The field that contains the email address varies, sometimes greatly, between data sources. Use the search bar to quickly find the correct field.
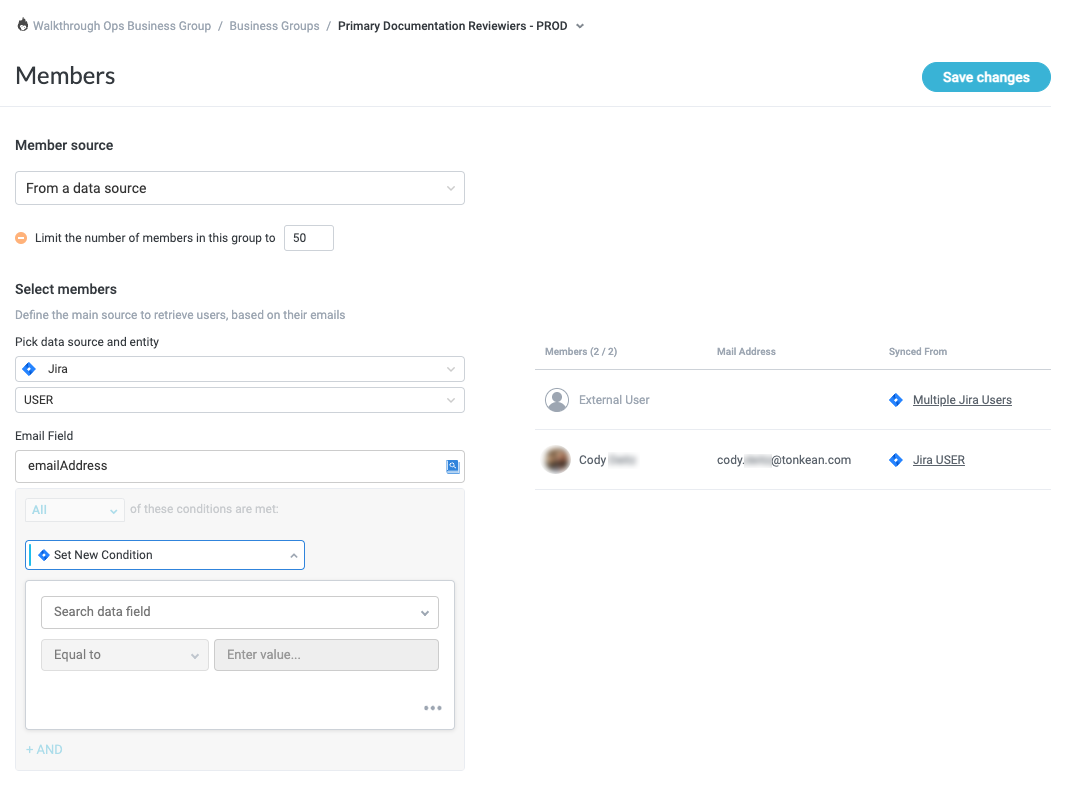
The list of members pulled from the data source displays on the right:
To filter users from the data source, select a primary field, a condition, and a qualifying value in the conditions section:
Select Search data field to select a field. The field dropdown displays.

Select a field from the dropdown. This is the primary field that the business group checks in the data source.
Select the condition field. This field defines how a value is matched or compared to the primary field.
For definitions for all available conditions, see Conditions.

Enter a value. This is the qualifying value that is compared to the primary field, based on the selected condition. Depending on field type of the item, this value may be predefined or you may have the option to enter free text.

As you configure the condition options, the member list on the right updates in real time to reflect your selections. Use this preview to ensure you're configuring things correctly.
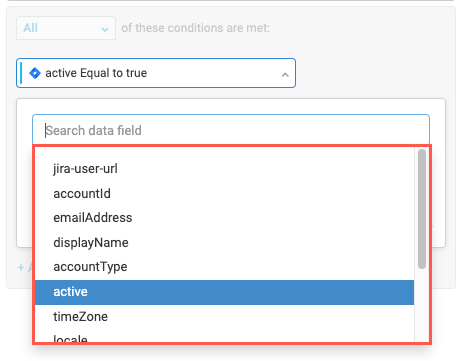
In the example below, the condition has been set to only include active users.
When finished, select Save changes.
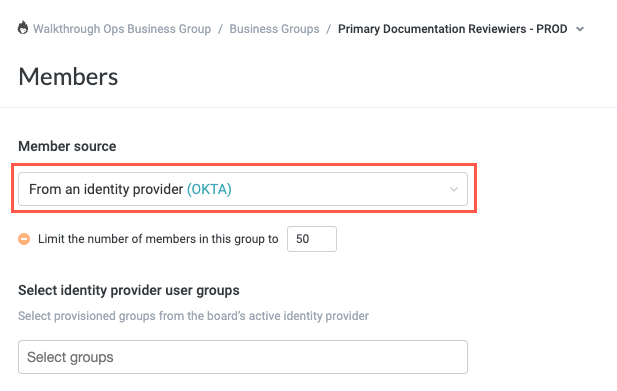
From an identity provider - Import user groups from a connected identity provider (for example, Okta).
For detailed instructions about connecting Okta as an identity provider see Connect an Okta Directory.
In the Member source dropdown, select From an identity provider.
Select the Select identity provder user groups field. A dropdown displays with all available user groups that exist in the connected identity provider.
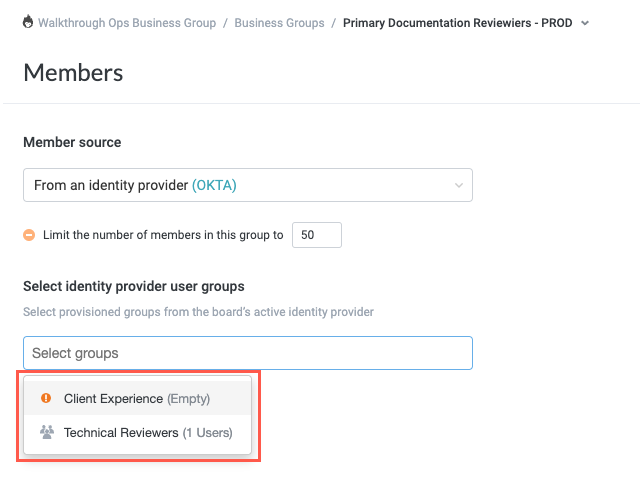
Select one or more user groups to include in the business group, then select Save changes.
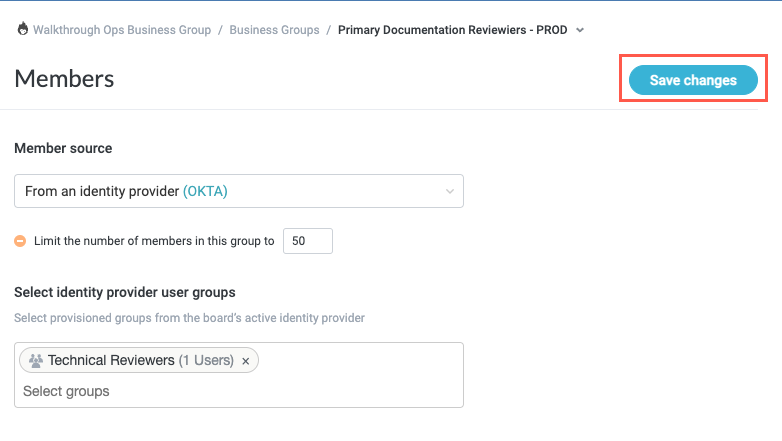
The business group now contains all users in the identity provider user group.
The business group now contains members and, after being assigned to an environment, is ready to use in a module.